How do I set up passwordless SSH login on Windows? (2 methods)
Every time you use SSH to remotely connect to a server, you have to enter the password manually. After disconnecting, you have to enter it again the next time you connect. So, is there a way to set up passwordless SSH login to a server on Windows? Absolutely. This article introduces two ways to configure passwordless SSH login from Windows to a Linux server, helping you say goodbye to the hassle of repeatedly entering passwords.

What Are the Methods for Passwordless SSH Login on Windows?
The key to passwordless SSH login on Windows lies in asymmetric encryption, which uses a pair of matching keys: a public key and a private key. The public key is uploaded to the cloud server, while the private key is stored locally on your Windows computer.
When you use SSH to remotely connect to a server, the server and your local computer automatically use this key pair to authenticate your identity. The public key is like a secure lock installed on the server, while the private key is the unique key you carry with you. As long as the key and lock match, you can log in directly without entering a password.
Method 1: Use the Built-in OpenSSH Feature
Windows 10/11 comes with the OpenSSH Client, a set of SSH client tools that allows you to connect to servers directly using SSH commands. You can also use ssh-keygen to generate an SSH key pair for passwordless login. The following steps explain how to configure passwordless SSH login.
1.Open CMD on your Windows computer, enter the following command, and press Enter.
ssh-keygen -t rsa -b 4096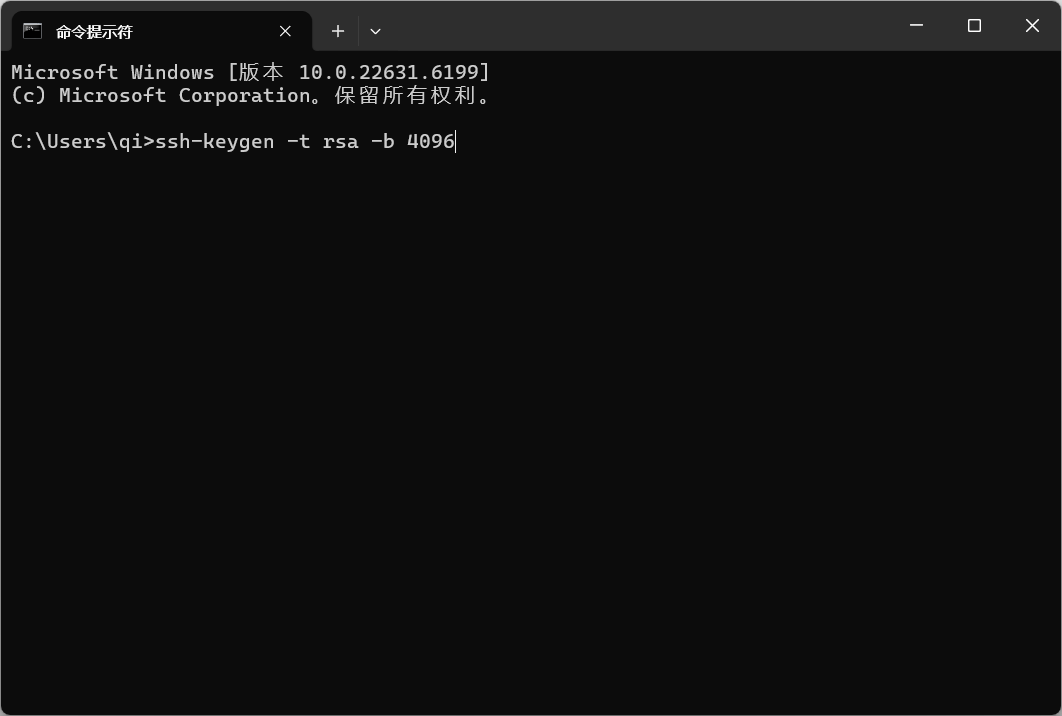
Explanation: This command generates an SSH login key pair using the RSA 4096-bit algorithm.
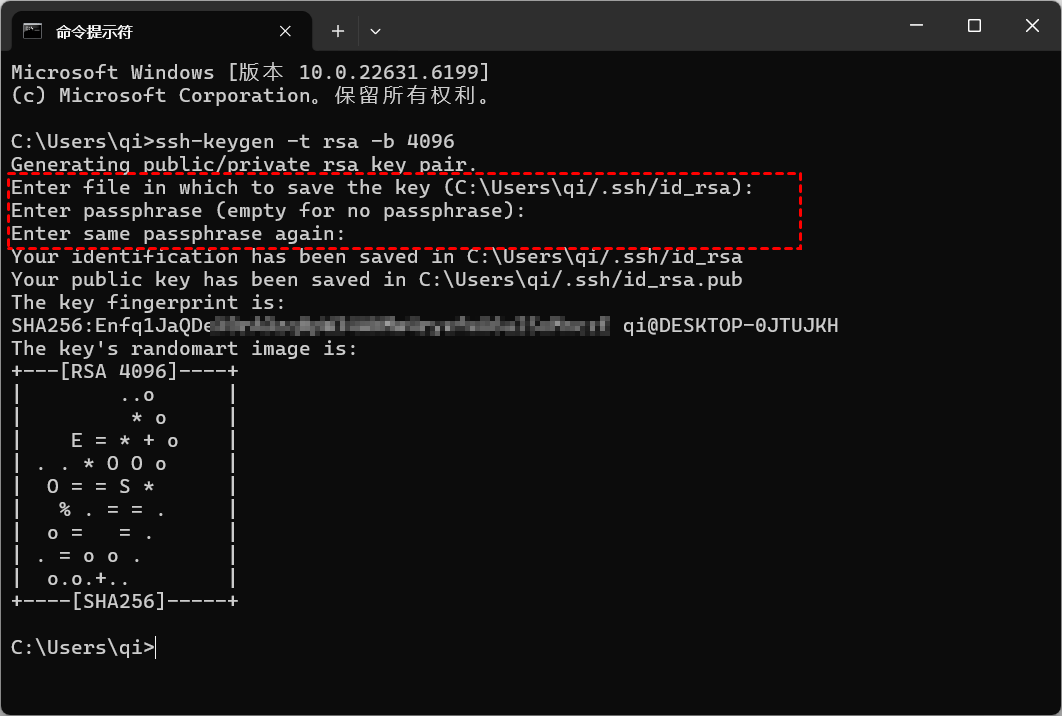
2.Next, you will be prompted to specify where to save the key and set a passphrase for the private key. Simply press Enter to keep the default settings.
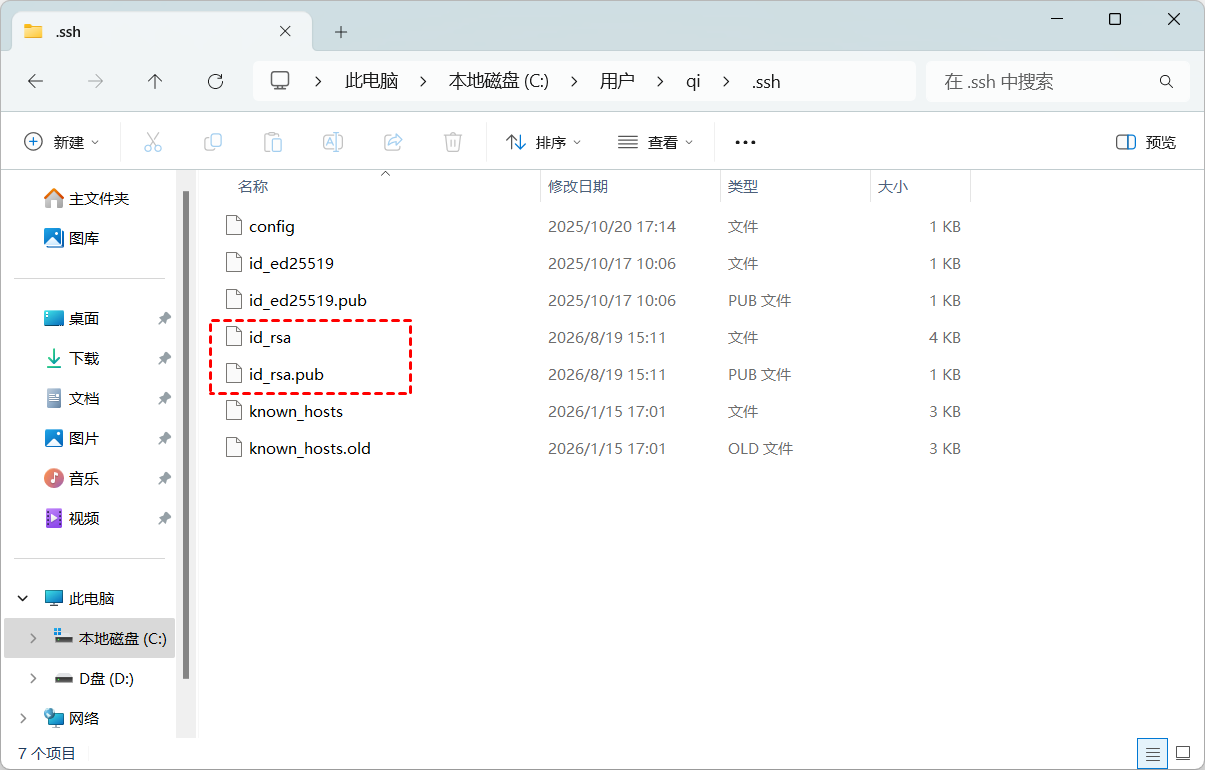
3.Open the directory where the keys are stored. The default location is C:\Users\Username.ssh. You will see that id_rsa (the private key) and id_rsa.pub (the public key) have been generated.
4.After generating the SSH keys, run the following scp command in CMD. Then, enter your cloud server password to copy the public key file to the cloud server.
scp C:\Users\qi.ssh\id_rsa.pub root@50.118..:/root/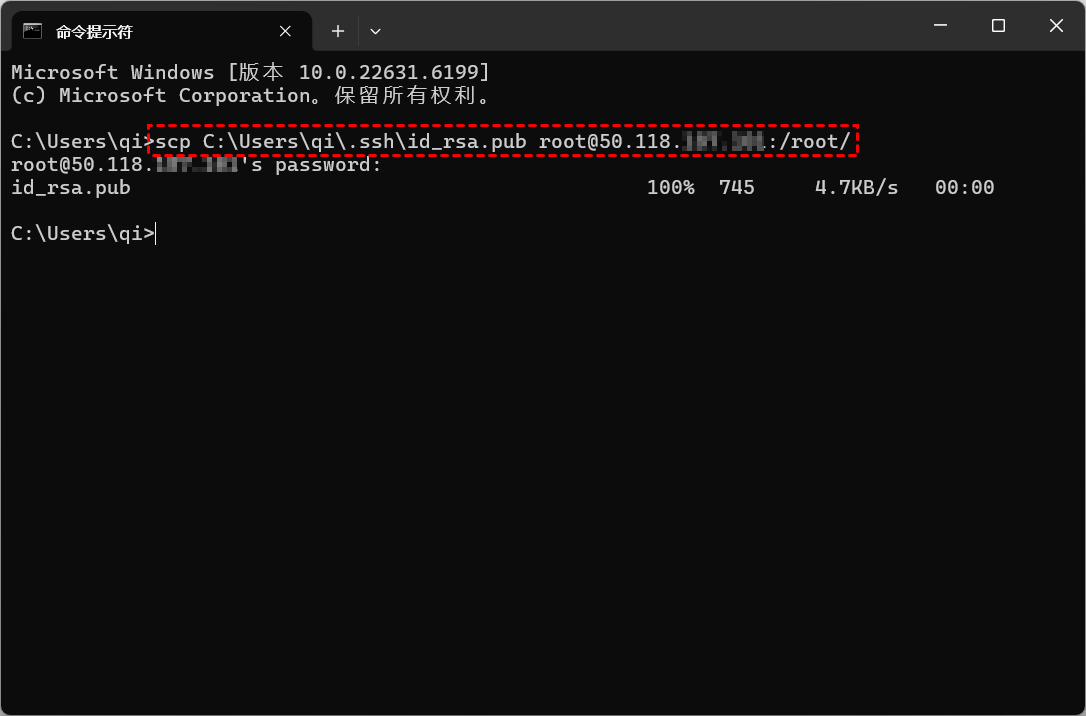
Explanation:
scp: A secure file-copy command.
C:\Users\qi.ssh\id_rsa.pub: The path to the local SSH public key file on Windows.
root@50.118..: The remote server login username and IP address.
/root/: The destination directory on the server.
5.Next, use the ssh username@server IP command to log in to the cloud server, and then run the following command to create the SSH key authentication directory.
mkdir -p ~/.ssh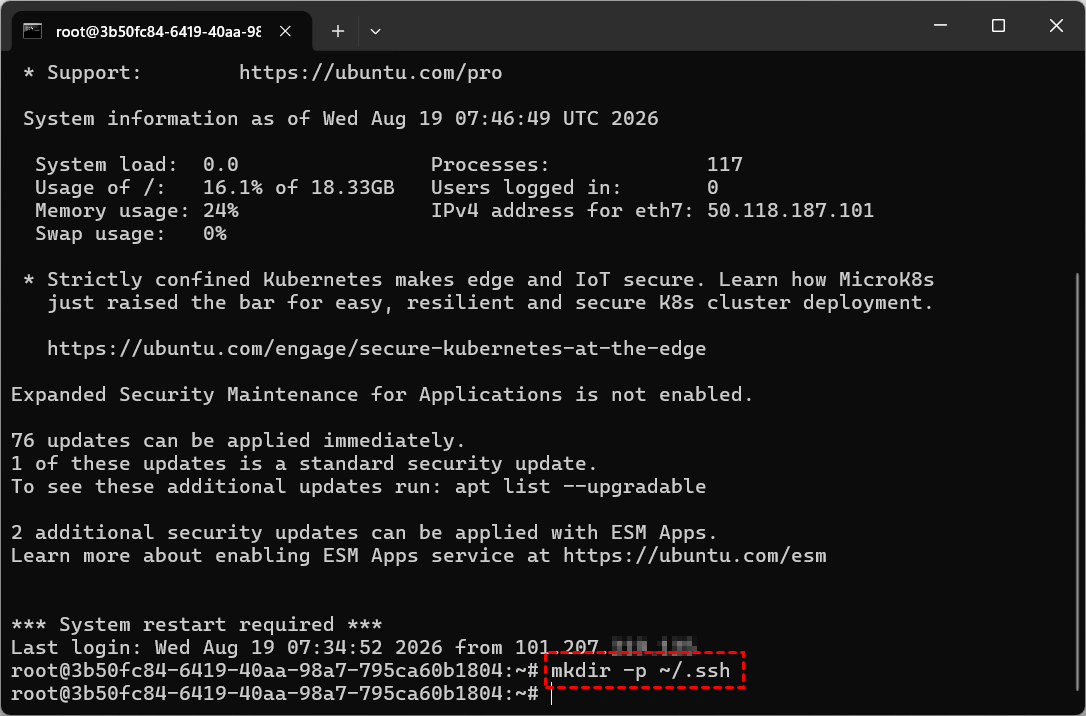
6.Run the following command to append the uploaded public key to the SSH authentication file authorized_keys.
cat /root/id_rsa.pub >> ~/.ssh/authorized_keys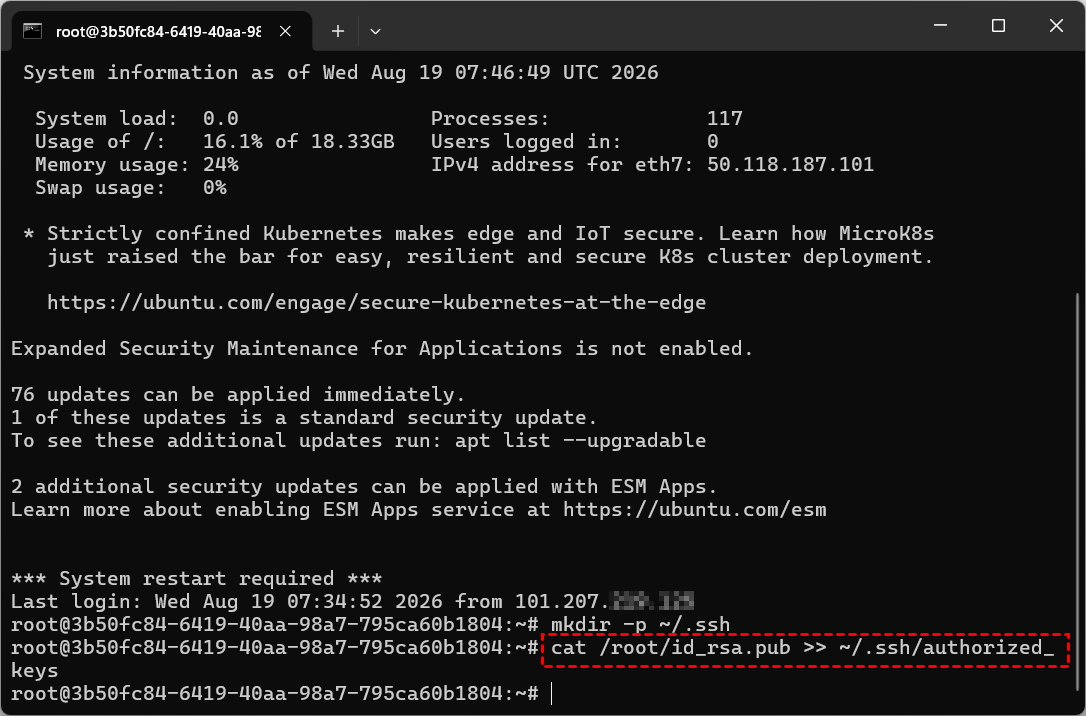
7.Run the following commands in sequence to set the appropriate file permissions so that the SSH service can accept the public key.
chmod 700 ~/.ssh
chmod 600 ~/.ssh/authorized_keys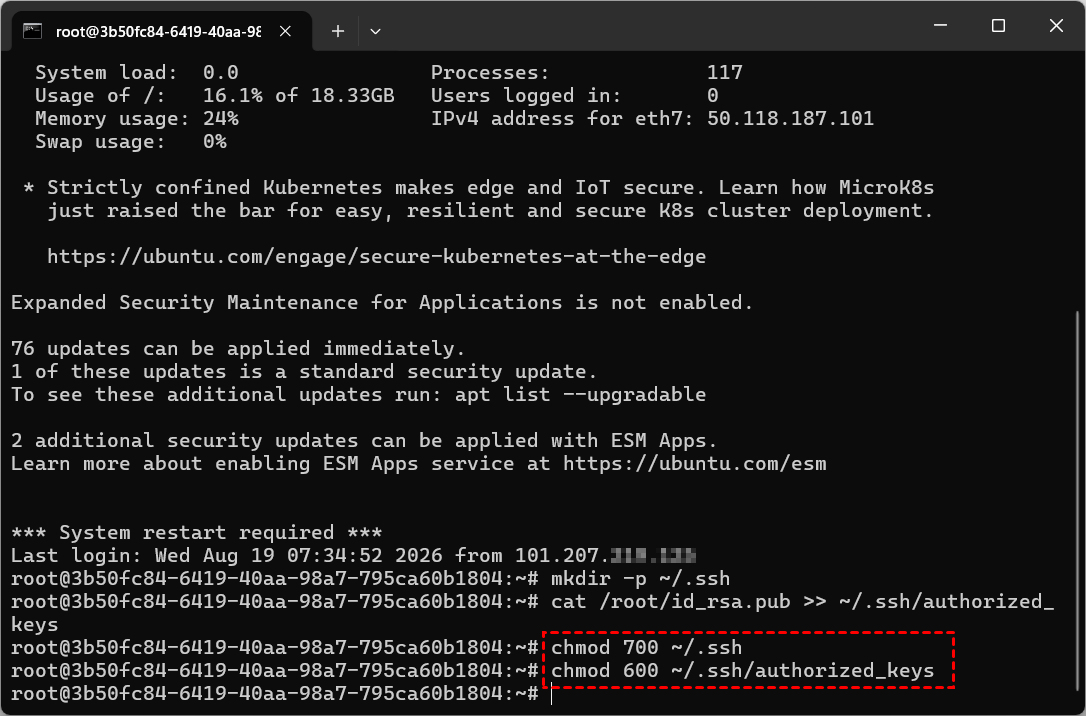
8.These are all the steps required to configure passwordless SSH login from Windows to a cloud server. You can now run the following command in CMD to connect directly to the cloud server without entering a password:
ssh root@50.118..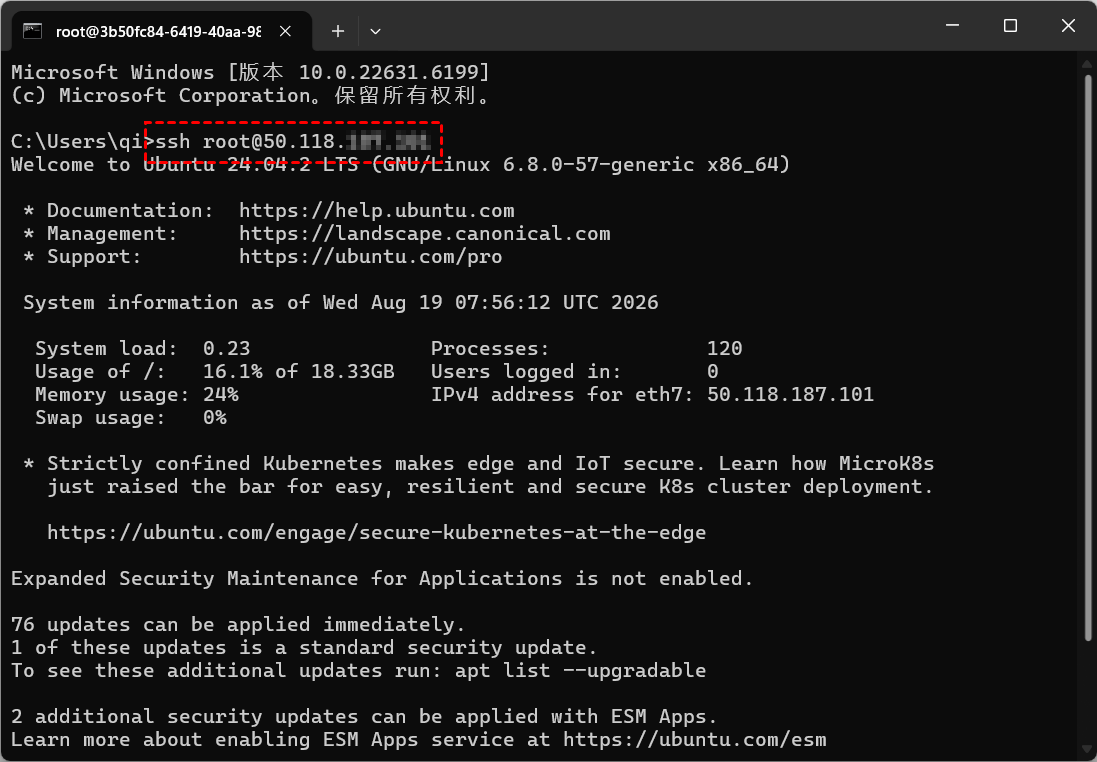
Method 2: Use an SSH Key Provided by a Cloud Service Provider
In addition to using ssh-keygen to generate an SSH key pair for passwordless login, some cloud service providers also allow you to add an SSH public key directly. One example is VMRack.
VMRack is a global cloud infrastructure provider offering cloud servers with premium network routes such as CN2 GIA, AS9929, and CMIN2, as well as CDN, object storage, cloud transcoding, and other services to meet the diverse deployment needs of businesses and developers.
The following steps use VMRack as an example to explain how to achieve passwordless login using an SSH key provided by a cloud service provider.
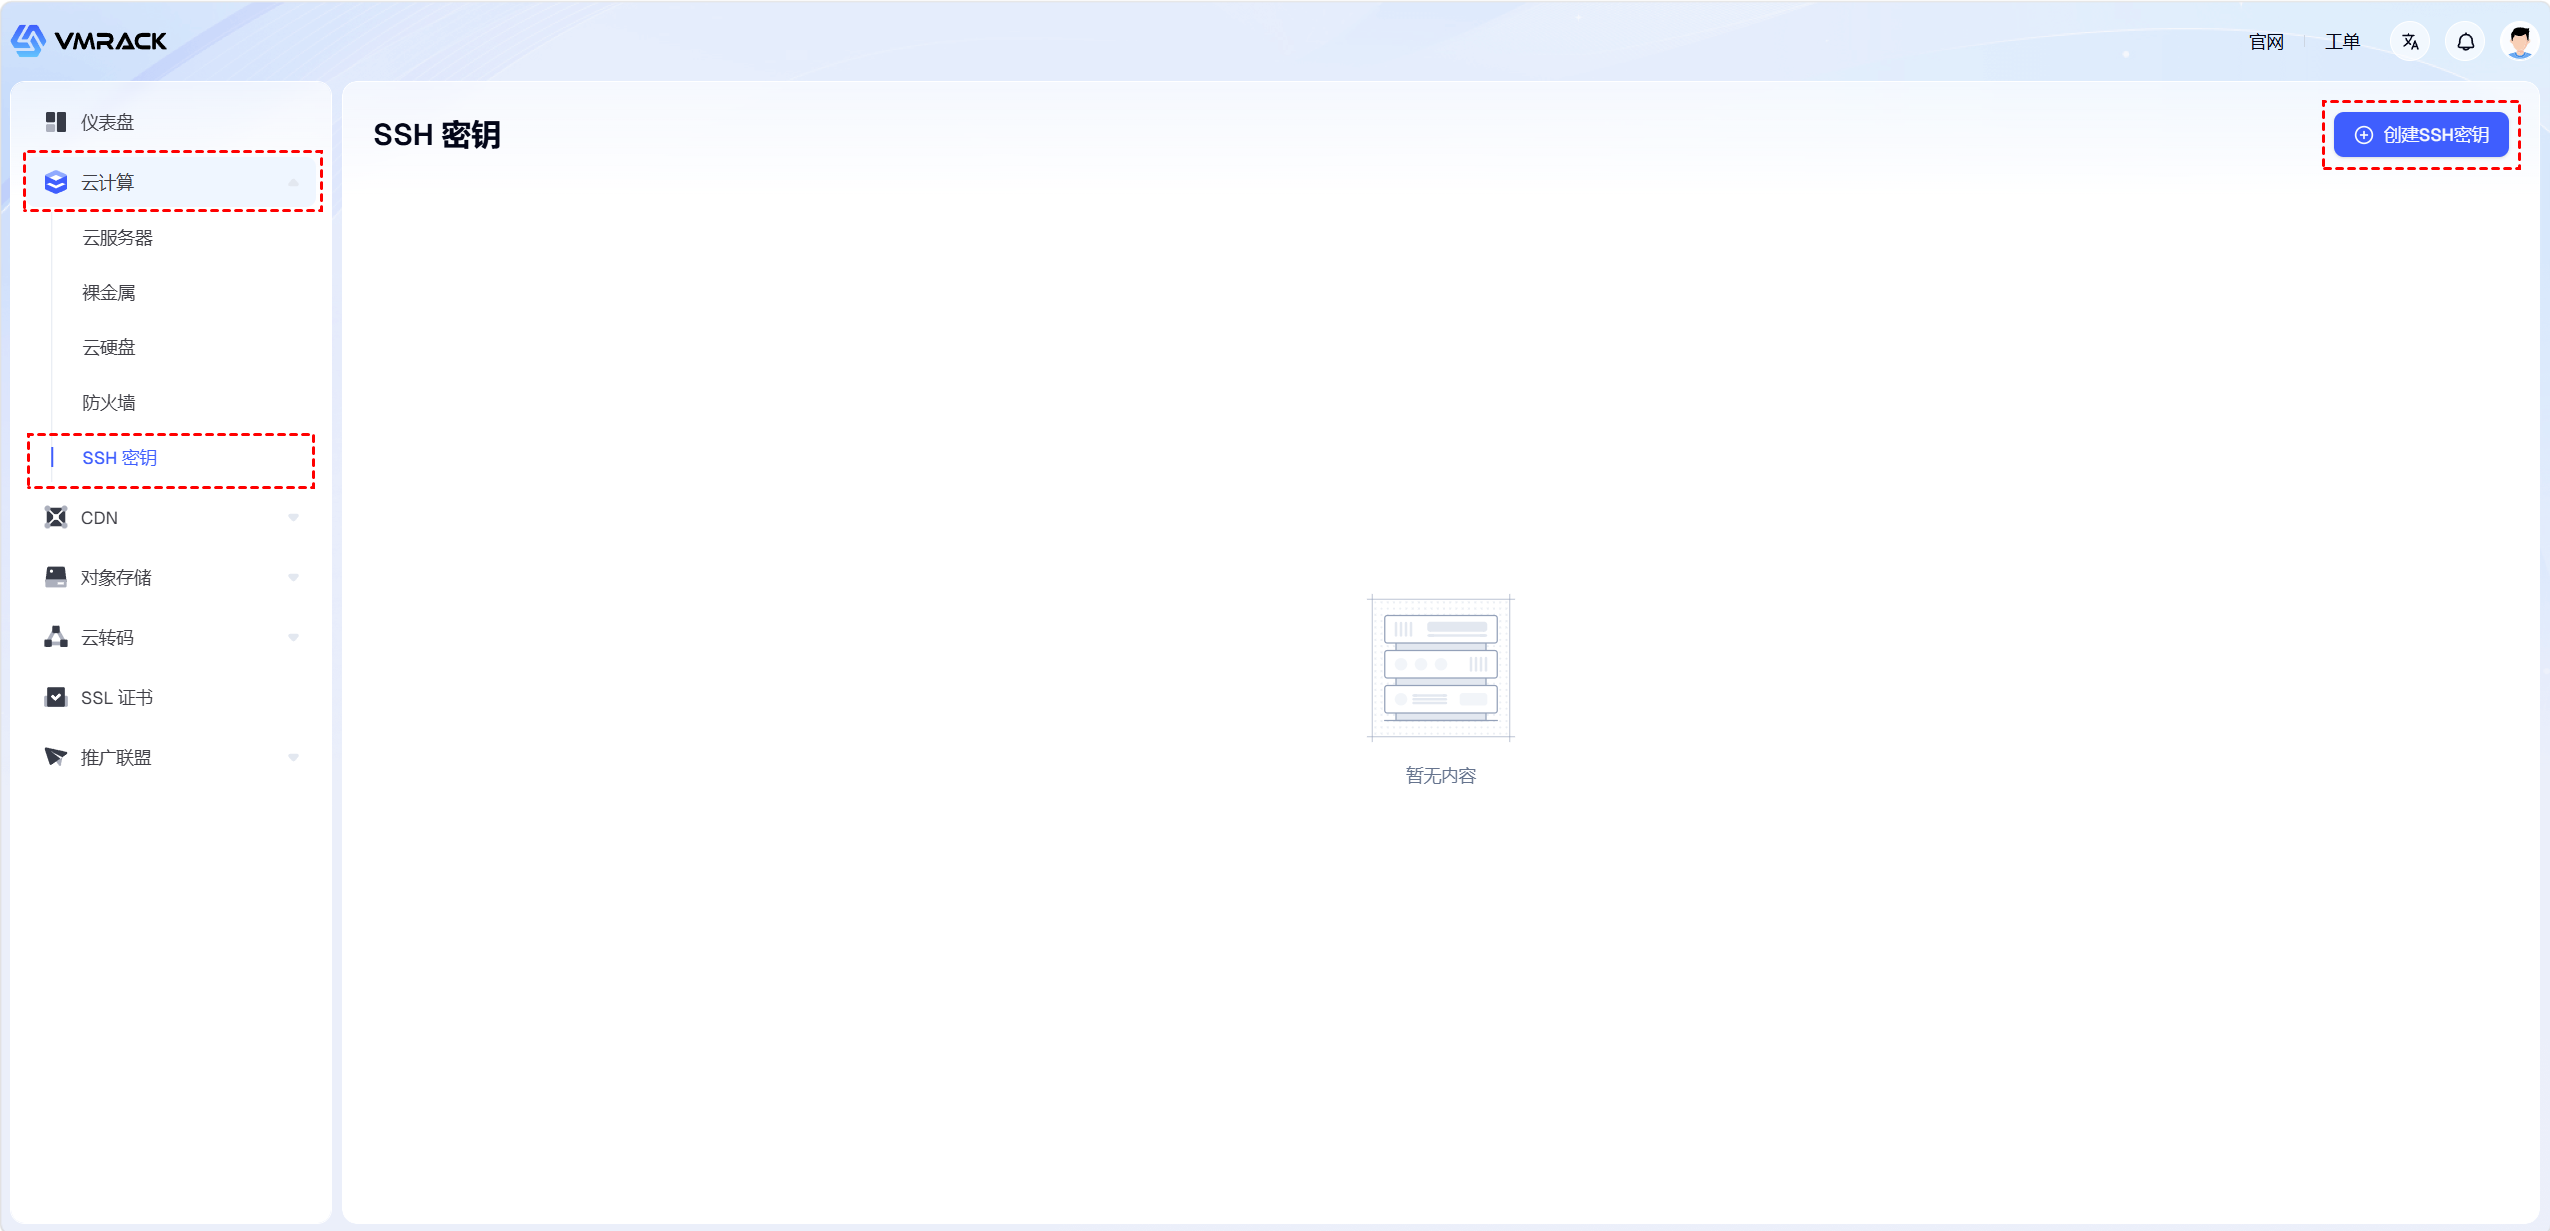
1.First, register for an account on the VMRack website and log in. Then, go to the console and select Cloud Computing > SSH Keys, and click Create SSH Key.
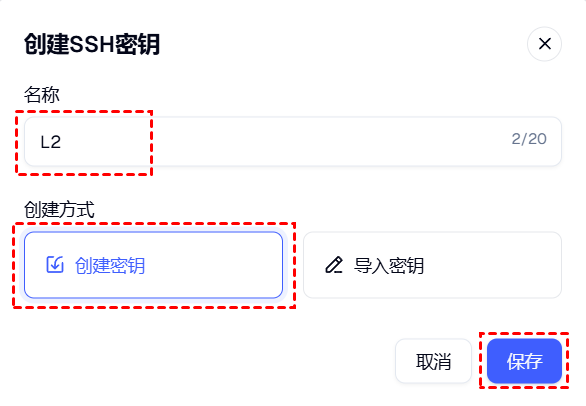
2.In the pop-up window, enter a name for the SSH key, select Create Key, and click Save.
3.After saving, a file named L2.pem will be downloaded automatically. This is the private key file, so make sure you remember where it is stored.
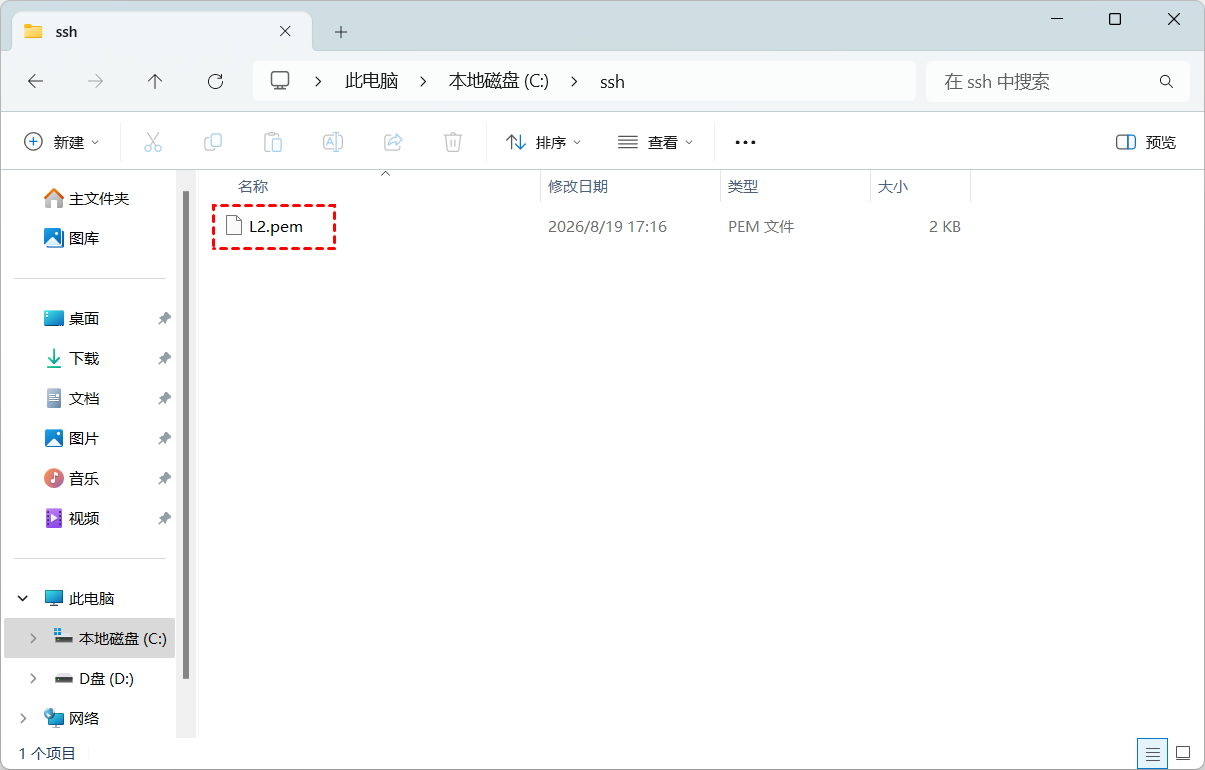
Note: In this tutorial, the L2.pem file is stored in C:\ssh.
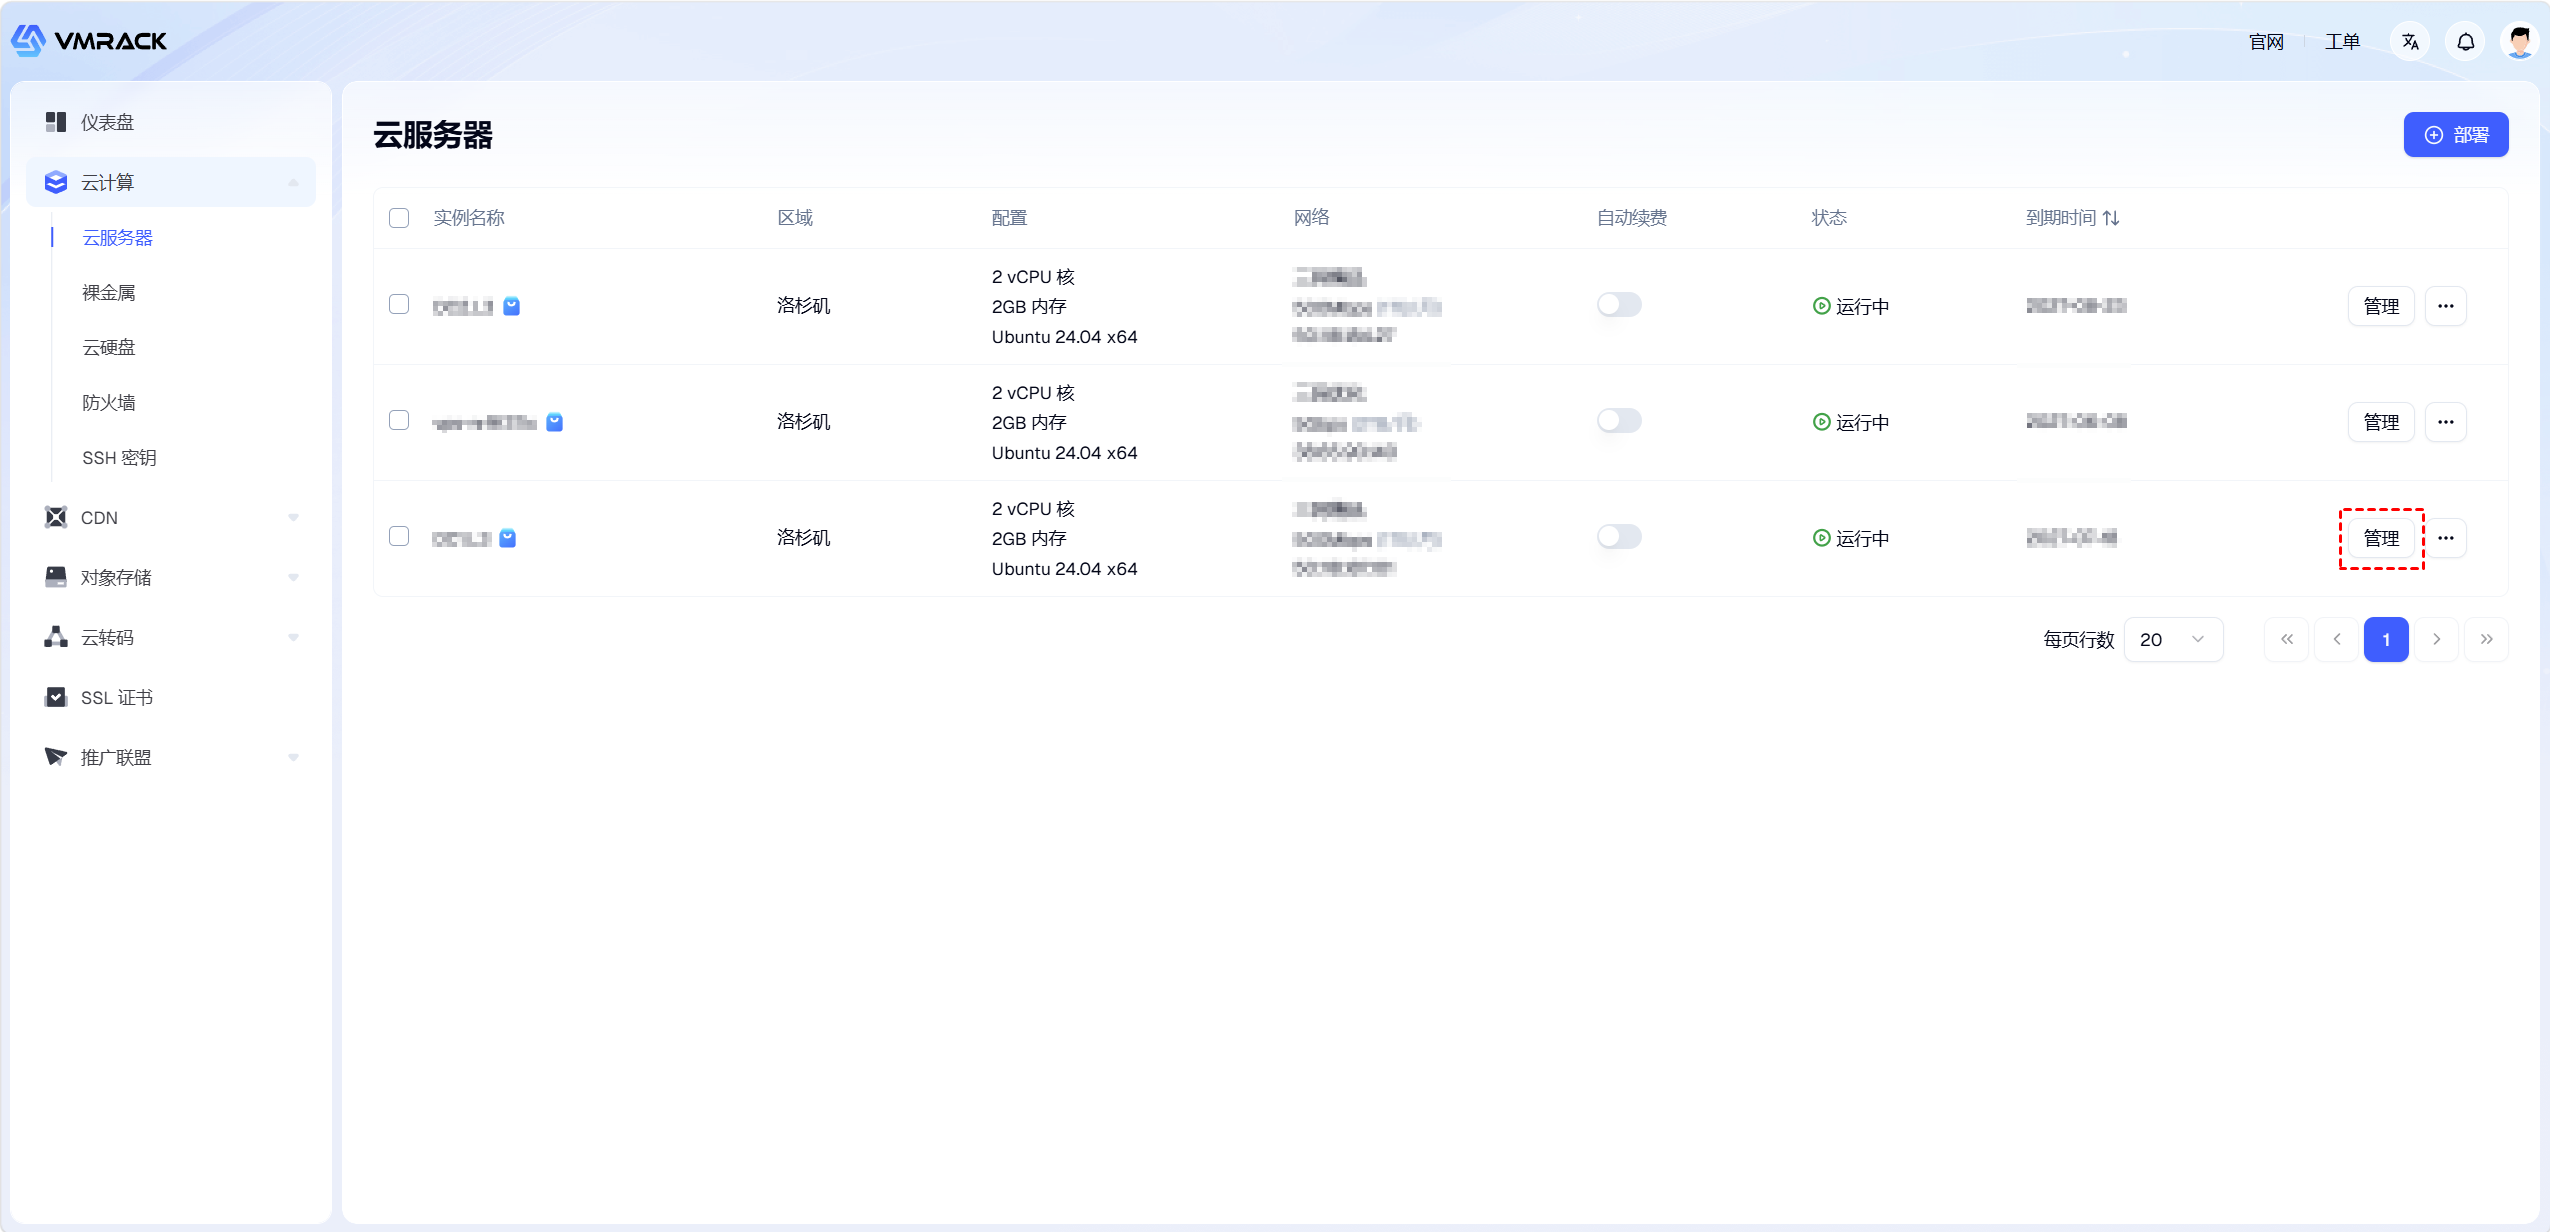
4.In the VMRack console, select Cloud Servers, find the cloud server for which you want to enable passwordless SSH login, and click Manage on the right.
5.In the cloud server details, select SSH Keys, and then click Create SSH Key.
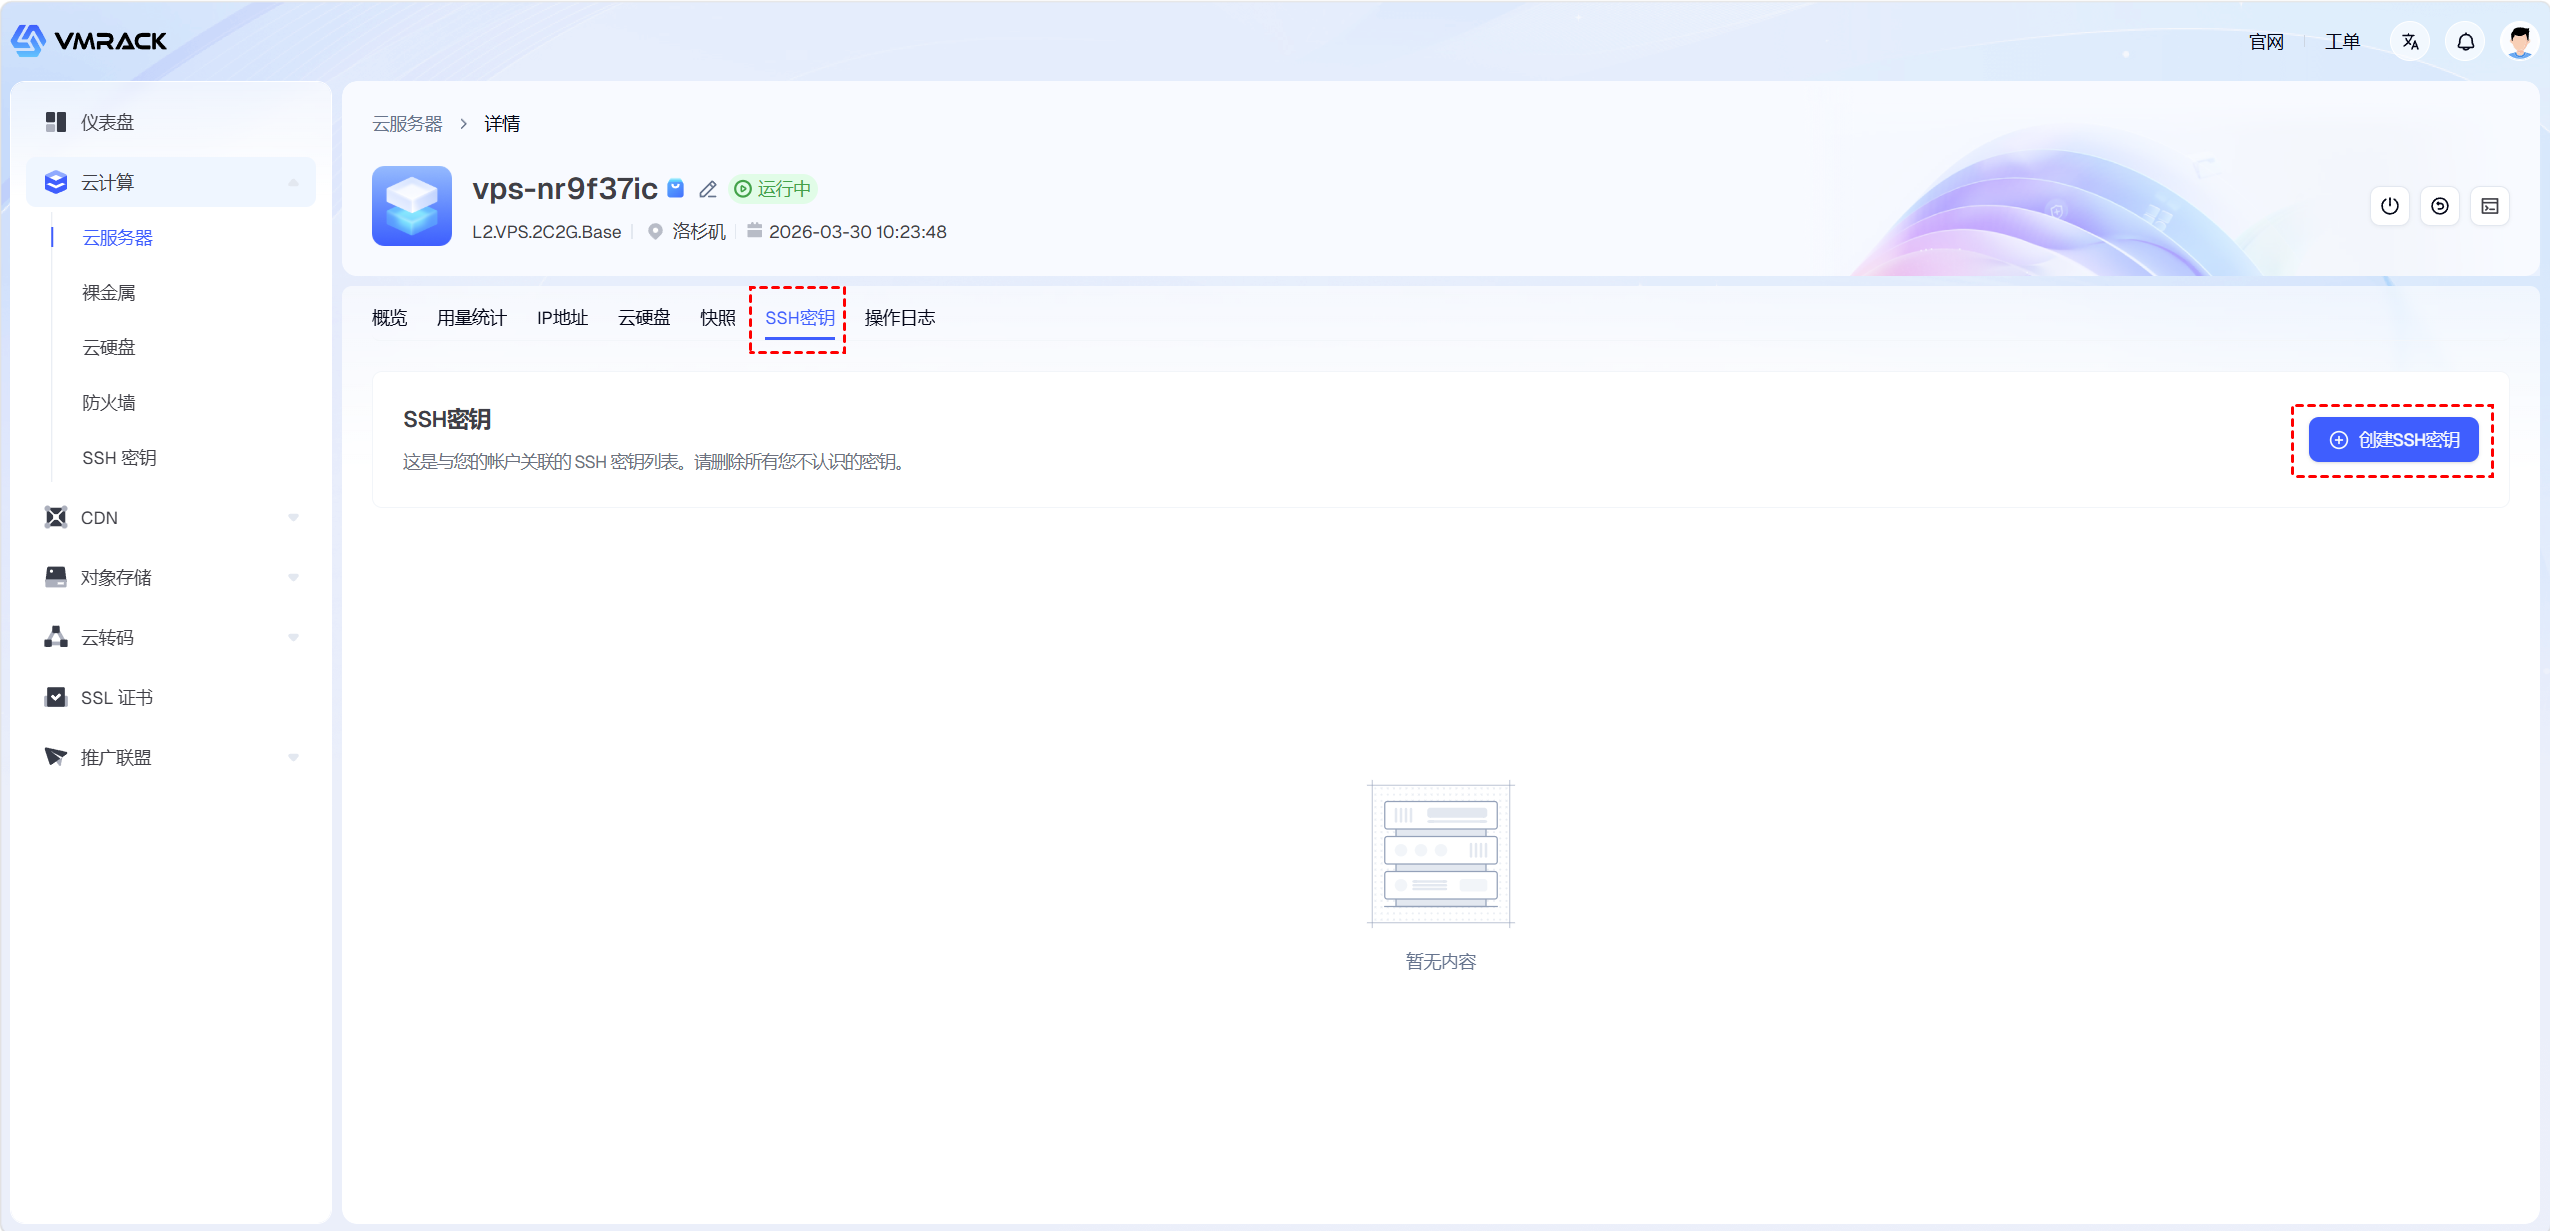
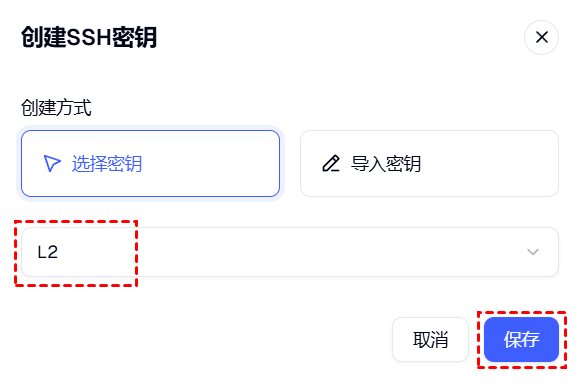
6.In the pop-up dialog box, select the SSH key named L2 that you just created, and click Save. The cloud server is now associated with the L2 SSH key.
7.Open Windows PowerShell and run the following command to remove the permissions inherited by the L2 private key file from the Windows file system.
icacls C:\ssh\L2.pem /inheritance:r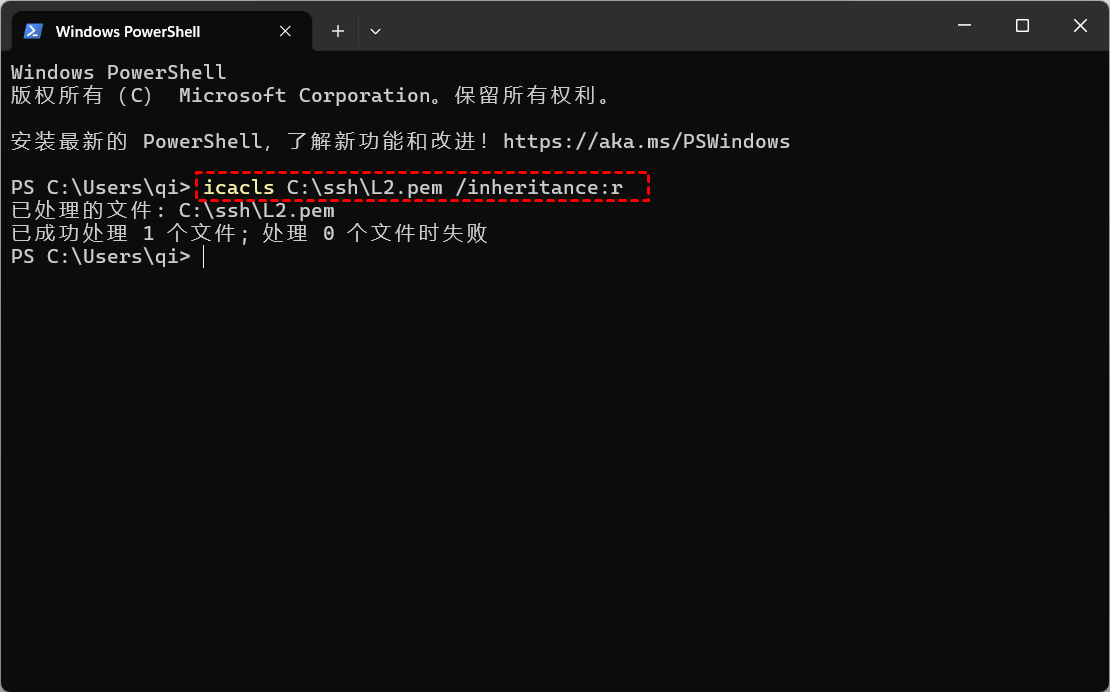
Note: Replace C:\ssh\L2.pem with the actual path where your private key file is stored.
8.Next, run the following command to grant the current Windows user, qi, read permission.
icacls C:\ssh\L2.pem /grant:r qi:R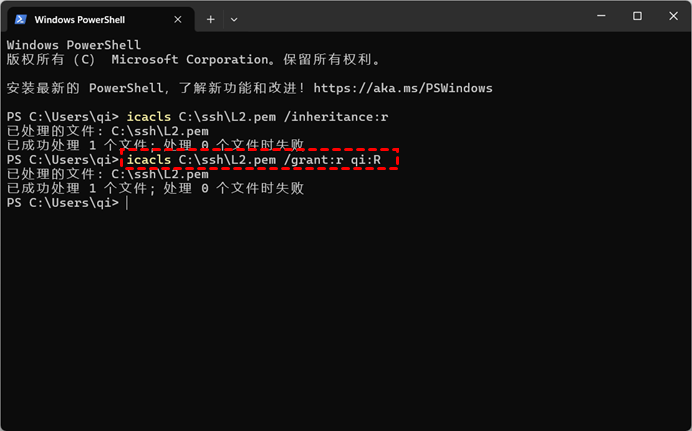
9.Run the following command to create a config file in the default directory used by Windows OpenSSH, C:\Users\qi.ssh.
notepad C:\Users\qi.ssh\config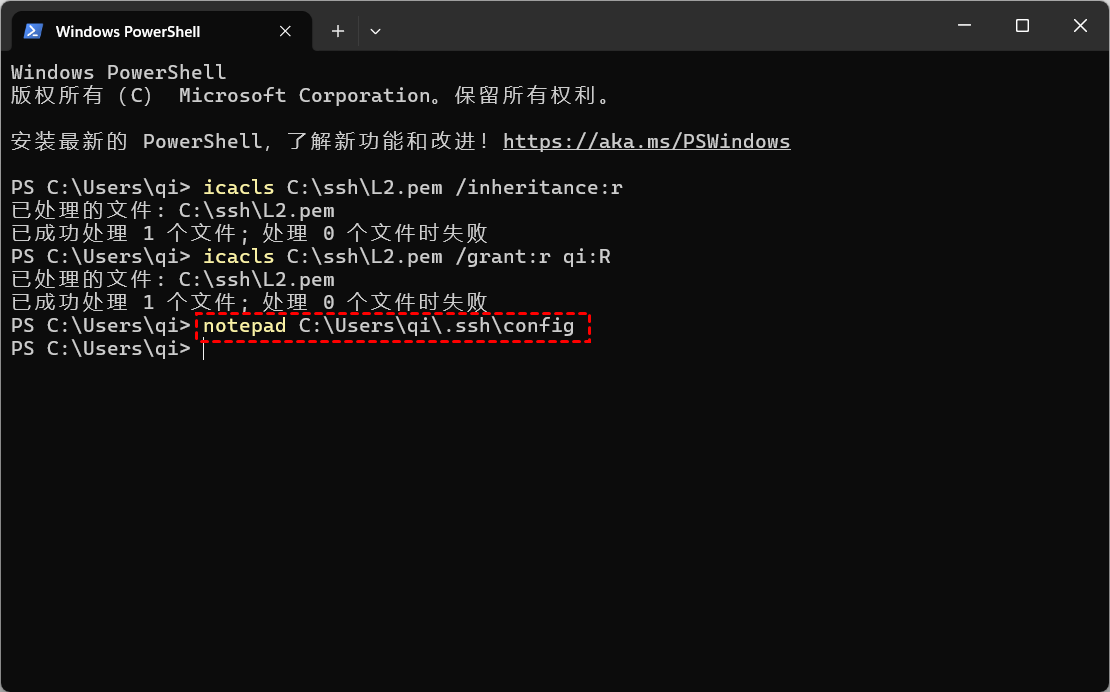
Note: The config file has no file extension and is not a .txt file.
10.Go to C:\Users\qi.ssh, open the config file, and enter the SSH configuration as shown in the example, then save the file.
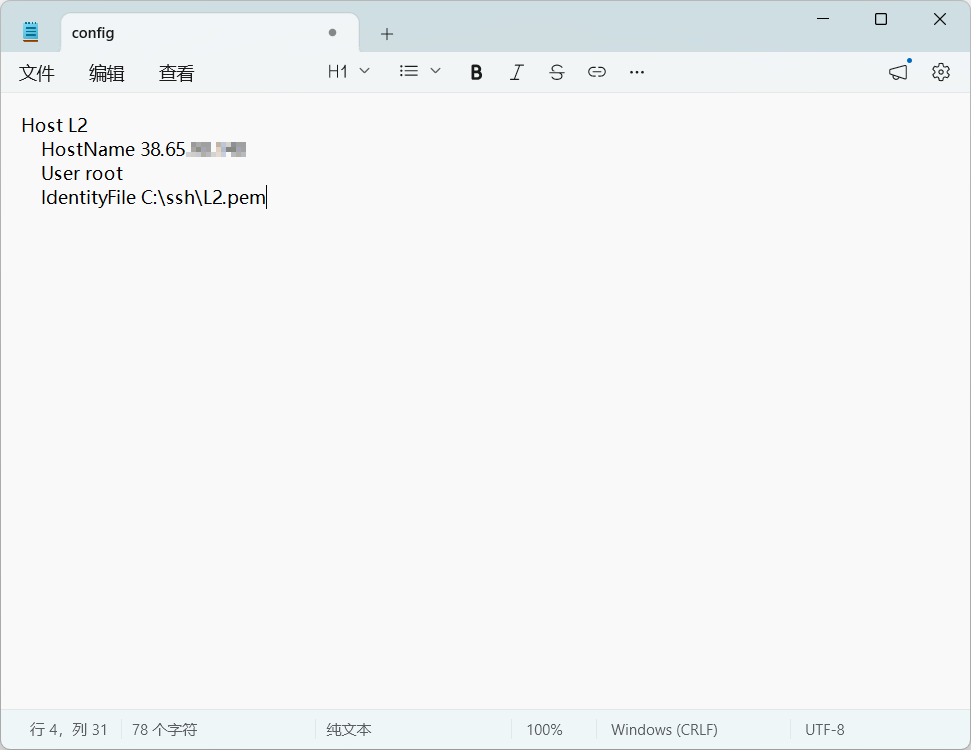
Explanation:
Host: Sets the login alias.
HostName: Specifies the server IP address.
User: Specifies the login username.
IdentityFile: Specifies the path to the private key.
11.You can now run the following command in Windows PowerShell to log in to the cloud server without entering a password:
ssh L2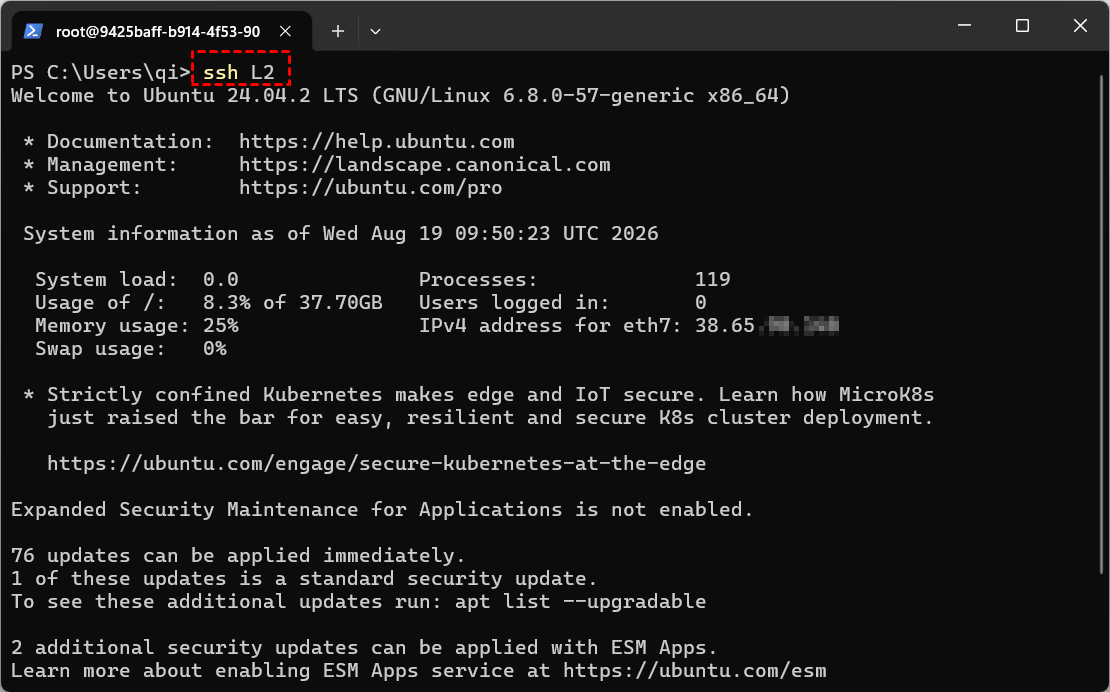
Conclusion
This article introduced two ways to configure passwordless SSH login from Windows to a cloud server. The first method uses the built-in OpenSSH feature in Windows, while the second uses an SSH key provided by a cloud service provider. Both methods make it easy to set up passwordless SSH login. You can choose the method that best suits your needs.

- Products
- VPS Hosting
- VPS HostingUnmetered
- Bare Metal
- GPU Rental
- CDNPublic Beta
- Custom CDN
- Object StoragePublic Beta
- TranscoderPublic Beta